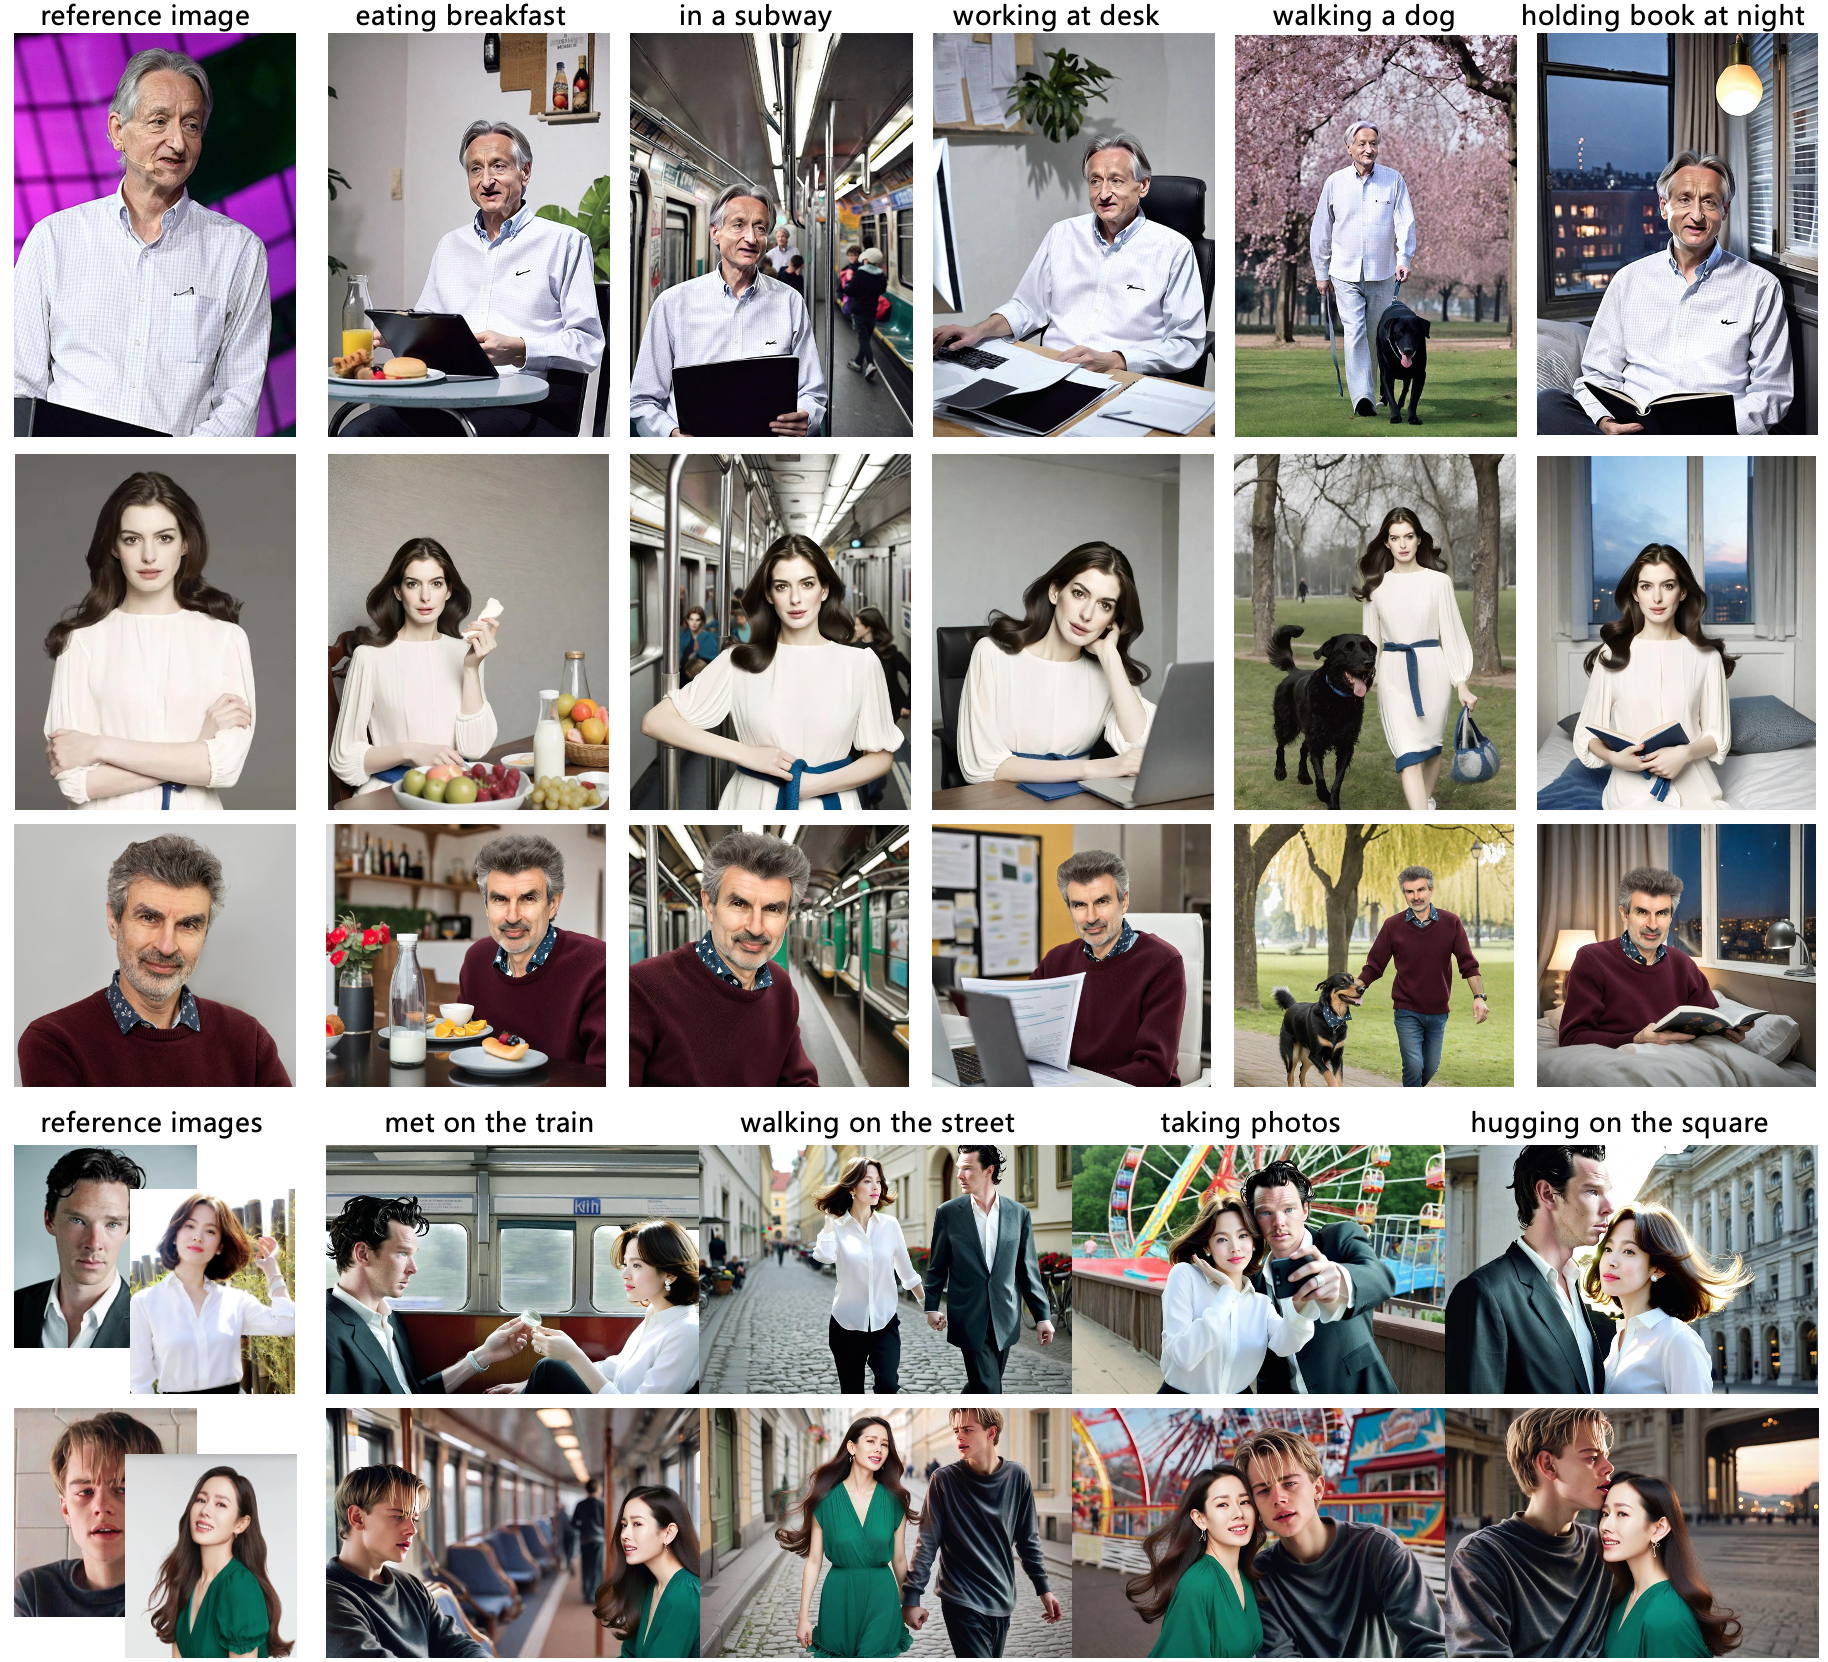
 Visualization of generated images by StoryMaker. First three rows tell a story about a day in the life of a "office worker" and the last two rows tell a story about a movie of "Before Sunrise".
- [2024/09/20] 🔥 We release the technical report.
- [2024/09/02] 🔥 We release the model weights.
You can directly download the model from Huggingface.
If you cannot access to Huggingface, you can use hf-mirror to download models.
export HF_ENDPOINT=https://hf-mirror.com
huggingface-cli download --resume-download RED-AIGC/StoryMaker --local-dir checkpoints --local-dir-use-symlinks False
For face encoder, you need to manually download via this URL to models/buffalo_l as the default link is invalid. Once you have prepared all models, the folder tree should be like:
  .
  ├── models
  ├── checkpoints/mask.bin
  ├── pipeline_sdxl_storymaker.py
  └── README.md
# !pip install opencv-python transformers accelerate insightface
import diffusers

import cv2
import torch
import numpy as np
from PIL import Image

from insightface.app import FaceAnalysis
from pipeline_sdxl_storymaker import StableDiffusionXLStoryMakerPipeline

# prepare 'buffalo_l' under ./models
app = FaceAnalysis(name='buffalo_l', root='./', providers=['CUDAExecutionProvider', 'CPUExecutionProvider'])
app.prepare(ctx_id=0, det_size=(640, 640))

# prepare models under ./checkpoints
face_adapter = f'./checkpoints/mask.bin'
image_encoder_path = 'laion/CLIP-ViT-H-14-laion2B-s32B-b79K'  #  from https://huggingface.co/laion/CLIP-ViT-H-14-laion2B-s32B-b79K

base_model = 'huaquan/YamerMIX_v11'  # from https://huggingface.co/huaquan/YamerMIX_v11
pipe = StableDiffusionXLStoryMakerPipeline.from_pretrained(
    base_model,
    torch_dtype=torch.float16
)
pipe.cuda()

# load adapter
pipe.load_storymaker_adapter(image_encoder_path, face_adapter, scale=0.8, lora_scale=0.8)
pipe.scheduler = UniPCMultistepScheduler.from_config(pipe.scheduler.config)
Then, you can customized your own images
# load an image and mask
face_image = Image.open("examples/ldh.png").convert('RGB')
mask_image = Image.open("examples/ldh_mask.png").convert('RGB')

face_info = app.get(cv2.cvtColor(np.array(face_image), cv2.COLOR_RGB2BGR))
face_info = sorted(face_info, key=lambda x:(x['bbox'][2]-x['bbox'][0])*(x['bbox'][3]-x['bbox'][1]))[-1] # only use the maximum face

prompt = "a person is taking a selfie, the person is wearing a red hat, and a volcano is in the distance"
n_prompt = "bad quality, NSFW, low quality, ugly, disfigured, deformed"

generator = torch.Generator(device='cuda').manual_seed(666)
for i in range(4):
    output = pipe(
        image=face_image, mask_image=mask_image, face_info=face_info,
        prompt=prompt,
        negative_prompt=n_prompt,
        ip_adapter_scale=0.8, lora_scale=0.8,
        num_inference_steps=25,
        guidance_scale=7.5,
        height=1280, width=960,
        generator=generator,
    ).images[0]
output.save(f'examples/results/ldh666_new_{i}.jpg')- Our work is highly inspired by IP-Adapter and InstantID. Thanks for their great works!
- Thanks Yamer for developing YamerMIX, we use it as base model in our demo.


