A static start page to get to your most important links, FAST. You can use this for your home server, new tab using browser extentions, use the demo page directly or basically anywhere you can server a static webpage from!
- Static Webpage
- Featured Links
- Categories
- Quick link preview
- Search (with search provider and tag support)
- Docker support
- Local Config management
- PWA support
- Keyboard shortcuts
- Full keyboard navigation support
Landing page
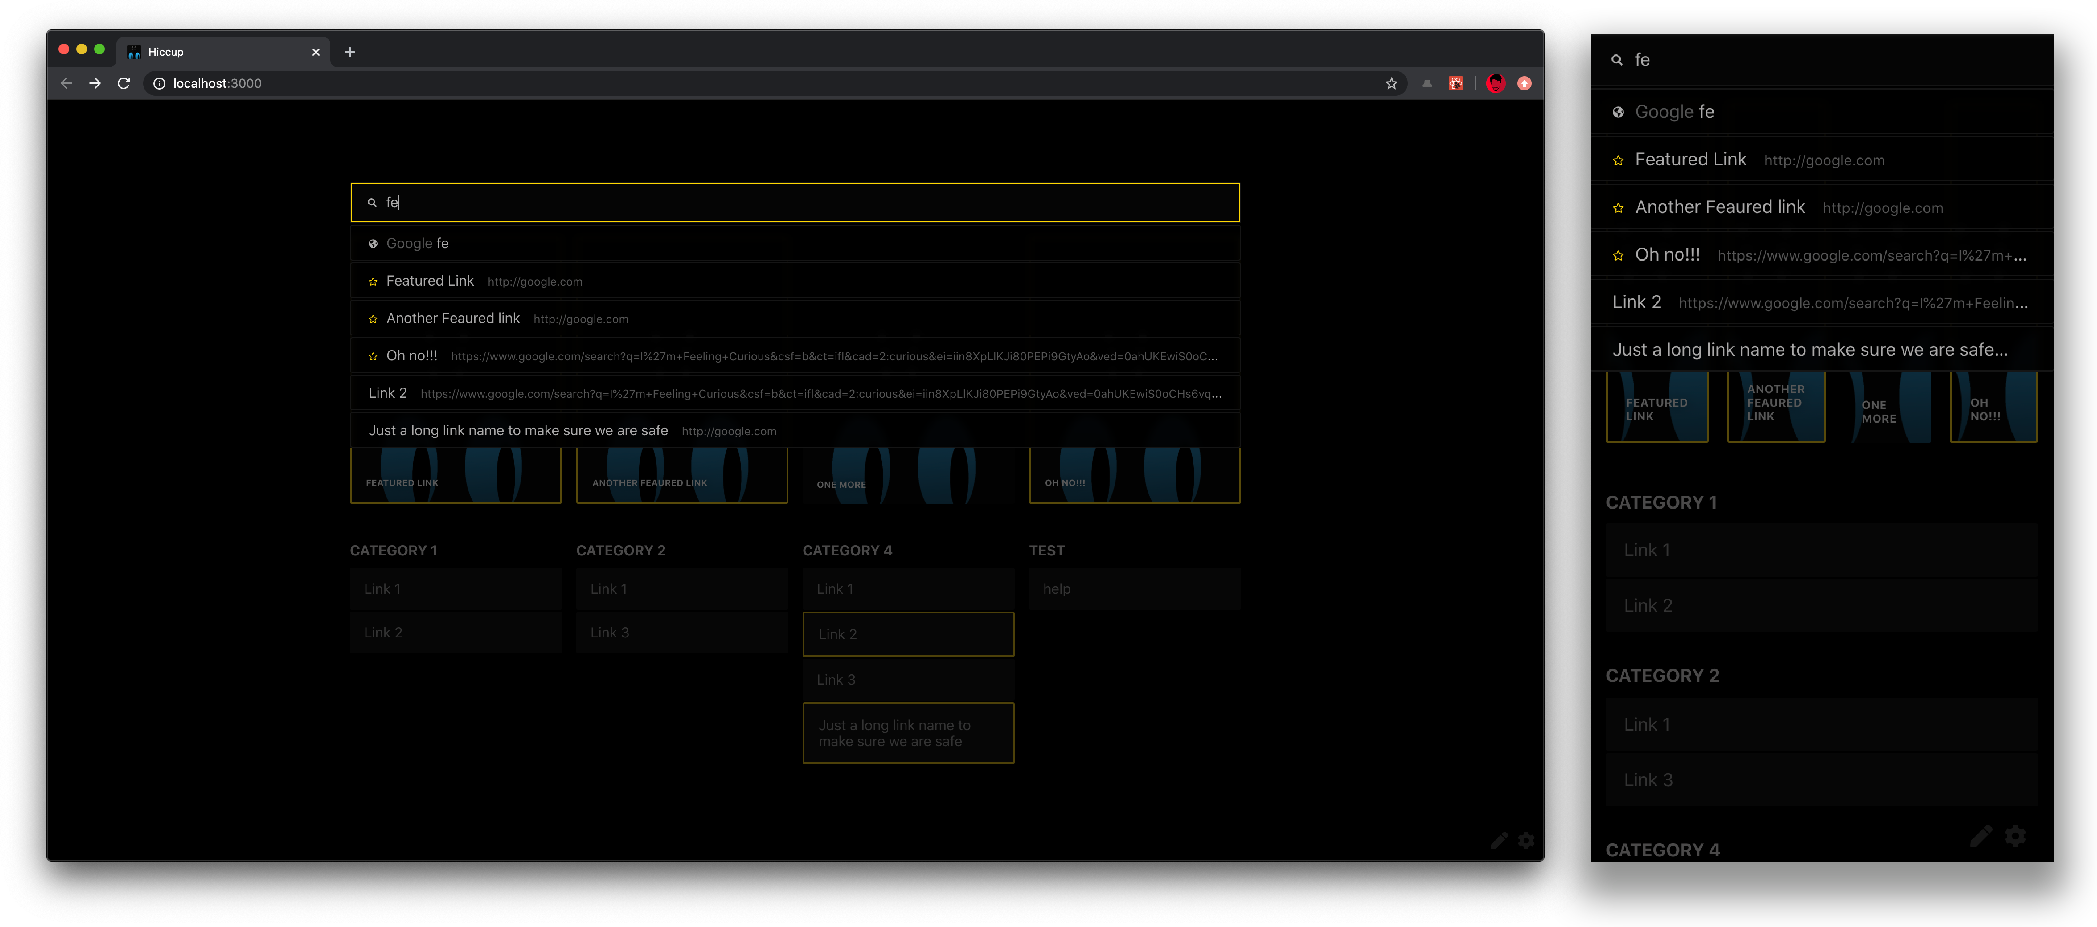
Quickly find links
Easily edit links
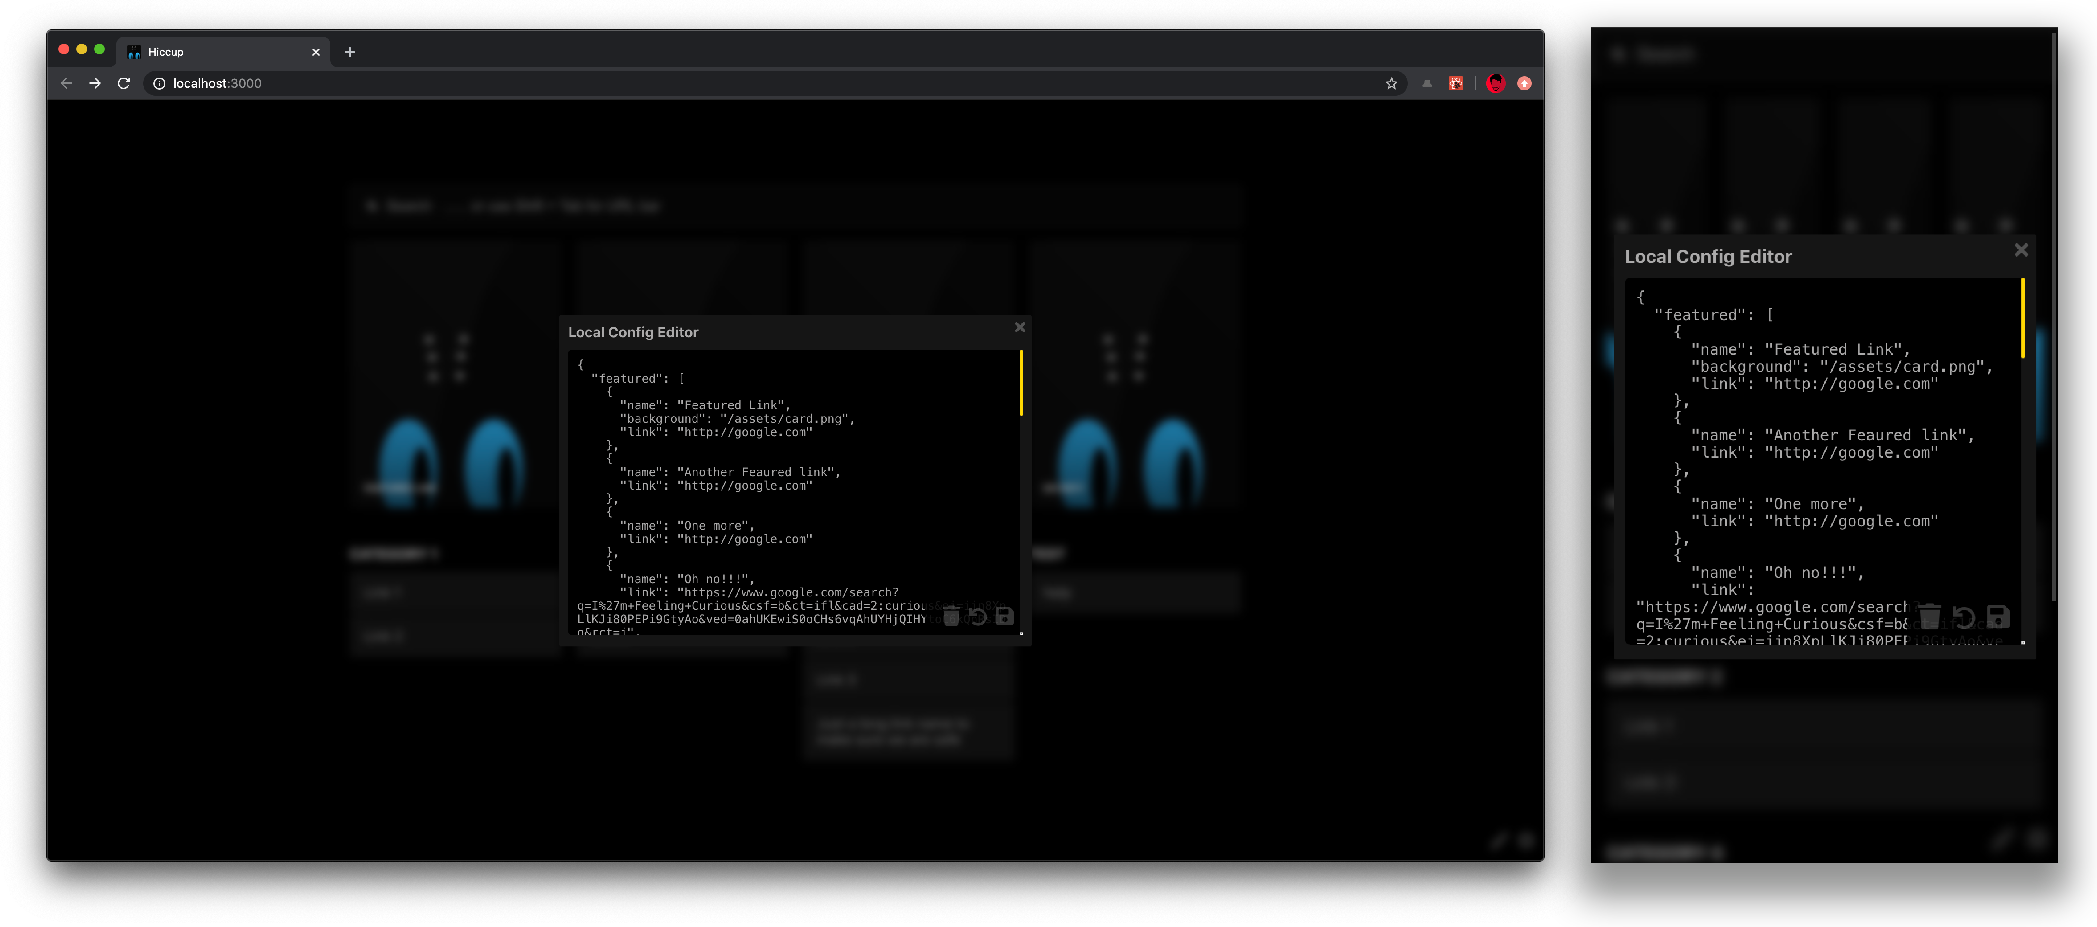
Locally manage config using JSON
Drag & drop config file
This project was bootstrapped with Create React App. Serve the release build or use any of the available react scripts to run the app.
The startpage uses a config.json file as the source of truth for page. It can be modified locally but the result will only be saved on the browsers localStorage and persist across sessions.
To use the app, you have many options
I have hosted an instance of the app here. Sinnce this is a static site, chages you make to the links only exist locally on your browser and are never sent anywhere. To save the links to other browsers, just doenload the config file from the editor using the download button and drag the config file onto a new instance of hiccup on your new browser. The links in your config stay private. You can even have multiple config files that you can load based on your need.
To run the app using docker the image bleckbeard/hiccup:latest. You can use the command below or the docker-compose.yaml file from the repo. Be sure to change the volume to the location of your local config file. Use the one in ./public/config.json for reference.
docker run \
    -p 8899:80 \
    -v `pwd`/public/config.json:/usr/share/nginx/html/config.json \
    bleckbeard/hiccup:latest
You cann download the built file or build it yourself and deploy to a static site provider like netlify or github-pages (or any other way to host a static site). To persist the config, edit the local config file. You can always sync the version of your config file to this using the config editor.
The app has a few hotkeys to help you easily navigate around. To quickly view the available hotkeys, use the Cmd/Ctrl + / hotkey!
Note: Hotkeys do not work when the search is bar is in focus. Use
Tabto focus out of the search bar and into the app or click anywhere outside the search bar to use hotkeys
The purpose of the search is to get to you link as easily as possible.
- Press
UpArrowandDownArrowto navigate the search - Press
Escto quit the search - Hit
Enterto open the first highlighted link amongst search results. (Featured cards have a star and the Search provider is marked by a globe)
Search looks at the name, link and tags field of each link in the config to find a match.
The edit mode can be activated using Cmd/Ctrl + e or the ✏️ icon on the bottom right of the screen. To exit the edit mode at any time use Esc or the commands used to start editing. The Edit mode lets you add, delete and edit links on the startpage.
The feaures currently supported are:
- Add, edit and delete upto 4 featured cards
- Add, edit and delete upto 4 categories
- Add, edit and delete category links
These limits were place intentionally to For more flexibility, you can directly edit the config using the config editor (described in the next section)
e.g.:
- Remove the category of featured section entirely
- Add more than 4 categories or featured cards
The
Edit modealters the config and if you ever wish to revert to the original config.json file, click the trash icon in the config editor to completely reset the config state.
Since this is a static website, the only way to permanently update the links is to modify the config.json file. If using the pre built version, just update the config.json file in the release zip. During development, update the config in the assets folder since the build will override any other config file.
To update config on a local browser instance, use the online config editor using the ⚙️ icon. This will persist the config across sessions. The local editor allows to:
- Edit the raw local config
- Sync the configuration from
./config.jsonfile - Download the latest valid config file
- Upload a local config file. (psst.. if the file has issues, no problem! The editor will still load it and show you the errors until you can save it)
- Save the config to LocalStorage
{
    // featured and catagories are optional sections. Remove them to use the page without it.
    "featured": [{
        "name": "Link name as seen on the card", // required
        "link": "link", // required
        "background": "path to background image", // optional
        "tags": "space spearated tags for searching" //optional
    }, {
        // ... Other featured links
    }],
    "catagories": [{
        "name": "Category name", // required
        "links": [{
            "name": "Link name as seen on the card", // required
            "link": "link", // required
            "tags": "space spearated tags for searching" //optional
        }, {
            // ... Other category links
        }]
    }, {
        // ... Other categorys
    }],
}
Refer to the JSON Scheme file for the latest schema.
{
    "featured": [{
        "name": "Featured Link",
        "link": "http://google.com",
        "background": "/assets/card.png"
    }, {
        "name": "Another Feaured link",
        "link": "http://google.com"
    }, {
        "name": "One more",
        "link": "http://google.com"
    }, {
        "name": "Oh no!!!",
        "link": "http://google.com",
        "tags": "space separated tags"
    }],
    "categories": [{
        "title": "Category 1",
        "links": [{
            "name": "Link 1",
            "link": "http://google.com"
        }, {
            "name": "Link 2",
            "link": "http://google.com"
        }]
    }, {
        "title": "Category 2",
        "links": [{
            "name": "Link 1",
            "link": "http://google.com"
        }, {
            "name": "Link 2",
            "link": "http://google.com"
        }]
    }, {
        "title": "Category 3",
        "links": [{
            "name": "Link 1",
            "link": "http://google.com",
            "tags": "more searchable tags"
        }]
    }, {
        "title": "Category 4",
        "links": [{
            "name": "Link 1",
            "link": "http://google.com"
        }, {
            "name": "Link 2",
            "link": "http://google.com"
        }, {
            "name": "Link 3",
            "link": "http://google.com"
        }, {
            "name": "Link 4",
            "link": "http://google.com"
        }]
    }]
}
In the project directory, you can run:
Runs the app in the development mode.
Open http://localhost:3000 to view it in the browser.
The page will reload if you make edits.
You will also see any lint errors in the console.
Launches the test runner in the interactive watch mode.
See the section about running tests for more information.
Builds the app for production to the build folder.
It correctly bundles React in production mode and optimizes the build for the best performance.
The build is minified and the filenames include the hashes.
Your app is ready to be deployed!
See the section about deployment for more information.
Note: this is a one-way operation. Once you eject, you can’t go back!
If you aren’t satisfied with the build tool and configuration choices, you can eject at any time. This command will remove the single build dependency from your project.
Instead, it will copy all the configuration files and the transitive dependencies (webpack, Babel, ESLint, etc) right into your project so you have full control over them. All of the commands except eject will still work, but they will point to the copied scripts so you can tweak them. At this point you’re on your own.
You don’t have to ever use eject. The curated feature set is suitable for small and middle deployments, and you shouldn’t feel obligated to use this feature. However we understand that this tool wouldn’t be useful if you couldn’t customize it when you are ready for it.
You can learn more in the Create React App documentation.
To learn React, check out the React documentation.
This section has moved here: https://facebook.github.io/create-react-app/docs/code-splitting
This section has moved here: https://facebook.github.io/create-react-app/docs/analyzing-the-bundle-size
This section has moved here: https://facebook.github.io/create-react-app/docs/making-a-progressive-web-app
This section has moved here: https://facebook.github.io/create-react-app/docs/advanced-configuration
To release the app
- Update the semver in the package.json
- Update the
Readme.mdif new features have been added or breaking changes have been introduced - Run the
release.shscript to:- build the code and bundle it
- deploy the latest docker images
- bundle the built code to add as an
.zipartifact to the github release
- Push the code to Github and create a new release
- Add the bundled zip as an artifact to the release and delete it locally
This section has moved here: https://facebook.github.io/create-react-app/docs/deployment
This section has moved here: https://facebook.github.io/create-react-app/docs/troubleshooting#npm-run-build-fails-to-minify


