- 创建小程序项目。
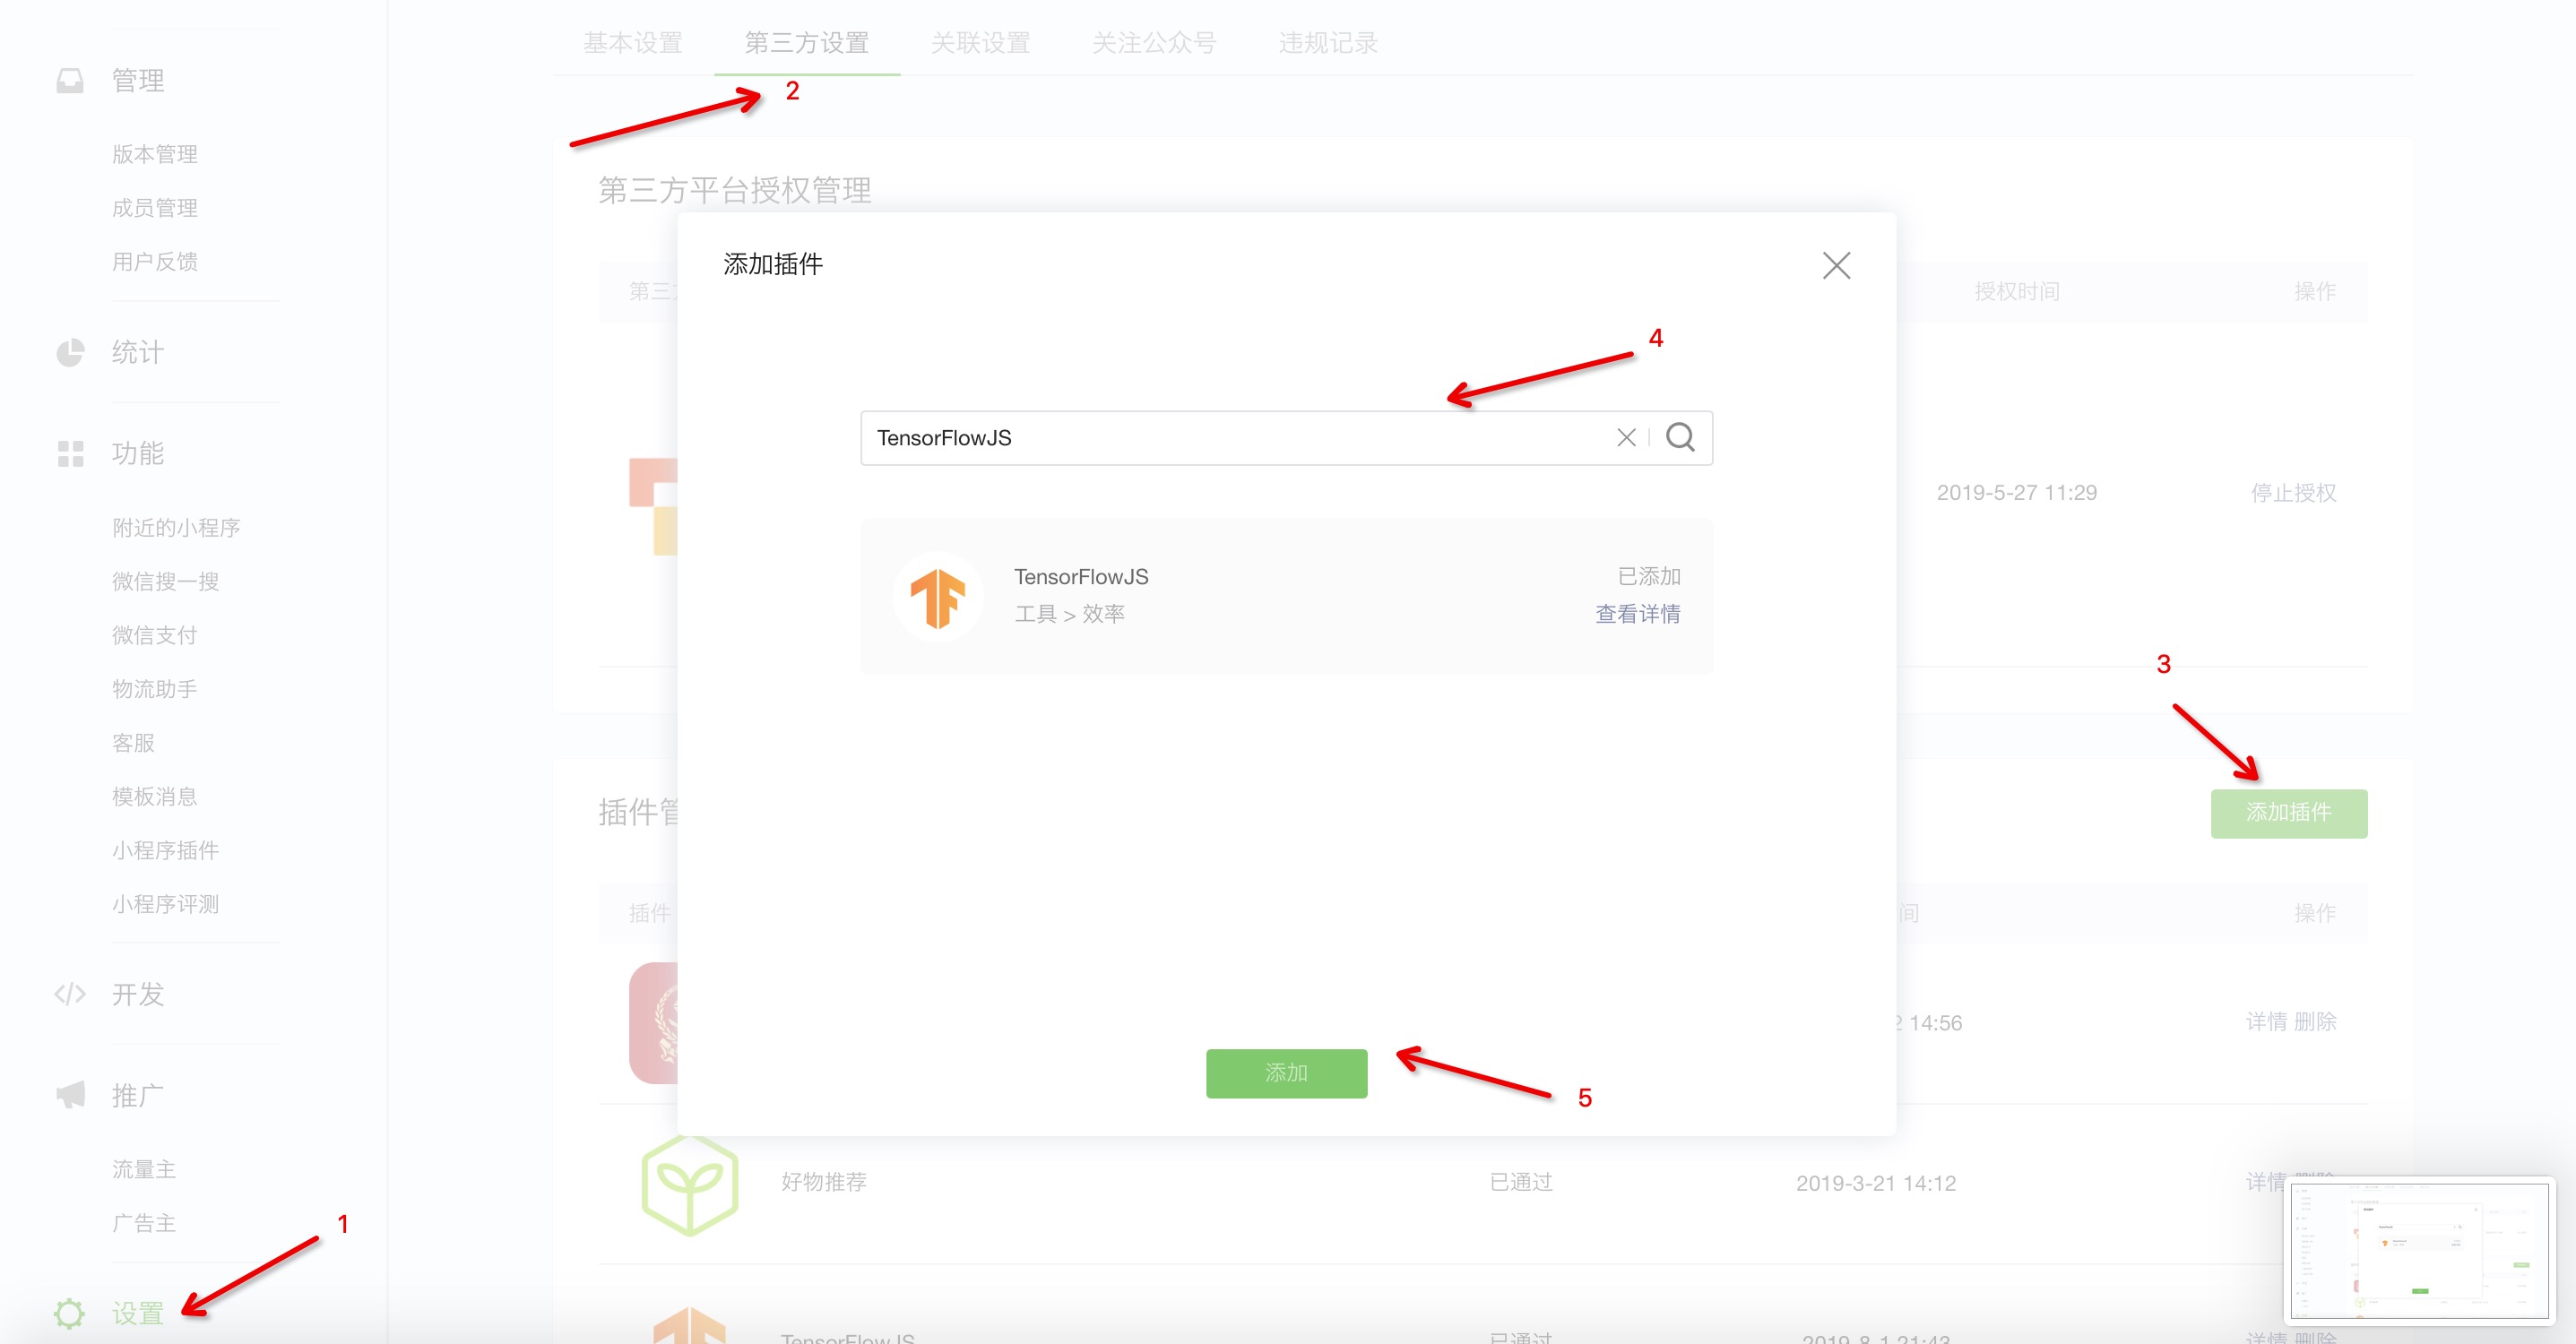
- 申请 TensorFlowJS 插件的使用。
- 小程序需要企业认证后才可以申请使用插件
- 添加方法:
- 登录小程序后台
- 设置 -> 第三方设置 -> 插件管理 -> 添加插件 ->搜索 TensorFlowJS -> 添加

- TensorFlowJS 文档
-
在小程序的 app.json 中添加
"plugins": {
  "tfjsPlugin": {
  "version": "0.0.5",
  "provider": "wx6afed118d9e81df9"
  }
}
-
打开终端,cd 到当前项目下,配置 npm
- npm init
- npm install @tensorflow/tfjs-core @tensorflow/tfjs-converter fetch-wechat regenerator-runtime @tensorflow-models/posenet
- 安装好了之后在小程序开发工具上 工具 -> 构建 npm (每次安装一次 npm 包都要重新构建一下)。
- 为什么安装这几个。
- 使用方法
- 在 app.js 中启用
var fetchWechat = require('fetch-wechat')
var tf = require('@tensorflow/tfjs-core')
var plugin = requirePlugin('tfjsPlugin')
//app.js
App({
  onLaunch: function() {
    plugin.configPlugin({
      fetchFunc: fetchWechat.fetchFunc(),
      tf,
      canvas: wx.createOffscreenCanvas()
    })
  }
})-
在 pages/index 中
-
index.wxml
<view class="container">
  <camera
    frame-size="small"
    device-position="back"
    flash="off"
    binderror="error"
    style="width:100%;height:100%"
  >
    <canvas canvas-id="pose" style="width:100%;height:100%" />
  </camera>
</view>
-
index.js
async onReady() {
  const camera = wx.createCameraContext(this)
  this.canvas = wx.createCanvasContext("pose", this)
  this.loadPosenet() // 加载模型
  let count = 0
  const lister = camera.onCameraFrame((frame) => {
     count++
     if (count === 10) {
       if(this.net){
         this.drawImg(frame)
         }
         count = 0
         return
        }
      }
  )
// lister.start() },
-
初始化 camera、canvas、以及模型, 监听 camera 的 onCameraFrame(需要设置 frame-size),取 10 桢开始画。
-
loadPosenet 异步加载模型 详情
this.net = await posenet.load({
  architecture: 'MobileNetV1',
  outputStride: 16,
  inputResolution: 193, // 移动端为了性能
  multiplier: 0.5
})
-
处理图片信息
async deleFrame(frame,net){
const imgData = {
  data: new Uint8Array(frame.data),
  width: frame.width,
  height: frame.height
} // 获取图片的数据
const imgSlice = tf.tidy(() => {
  // 此方法用于释放内存
  const imgTensor = tf.browser.fromPixels(imgData, 3)
  return imgTensor.slice([0, 0, 0], [-1, -1, 3]) //截取数据
})
const pose = await net.estimateSinglePose(imgSlice, {
  flipHorizontal: false // 不反转图片
})
imgSlice.dispose()
return pose
}
-
根据处理好的数据画点线
async drawImg(frame){
const pose = await this.deleFrame(frame, this.net)
console.log(pose)
if(pose == null || this.canvas == null ) return
if(pose.score>=0.3 ){ // 姿势打分的数据
for(let item in pose.keypoints){
const point = pose.keypoints[item]
if (point.score >= 0.5){
const {x,y} = point.position
this.drawCircle(this.canvas,x,y)
  }
}
// 画线
const adjacentKeyPoints = posenet.getAdjacentKeyPoints(pose.keypoints,0.5)
for (let i in adjacentKeyPoints){
const points = adjacentKeyPoints[i]
this.drawLine(this.canvas,points[0].position, points[1].position)
  }
  this.canvas.draw()
}
},
-
画点
drawCircle(canvas,x,y){
  canvas.beginPath()
  canvas.arc(x*0.72,y*0.72,3,0,2*Math.PI)
  canvas.fillStyle = `aqua`
  canvas.fill()
},
-
画线
drawLine(canvas,pos0,pos1){
  canvas.beginPath()
  canvas.moveTo(pos0.x*0.72,pos0.y*0.72)
  canvas.lineTo(pos1.x*0.72,pos1.y*0.72)
  canvas.lineWidth = 2
  canvas.strokeStyle = `aqua`
  canvas.stroke()
}
-
-
使用 tfjs-models 模型库注意事项
模型库提供了一系列训练好的模型,方便大家快速的给小程序注入 ML 功能。模型分类包括
- 图像识别
- 语音识别
- 人体姿态识别
- 物体识别
- 文字分类
由于这些 API 默认模型文件都存储在谷歌云上,直接使用会导致中国用户无法直接读取。在小程序内使用模型 API 时要提供 modelUrl 的参数,可以指向我们在谷歌中国的影像服务器。 谷歌云的 base url 是 https://storage.googleapis.com, 中国镜像的 base url 是https://www.gstaticcnapps.cn 模型的 url path 是一致的,比如
- posenet 模型的谷歌云地址是: https://storage.googleapis.com/tfjs-models/savedmodel/posenet/mobilenet/float/050/model-stride16.json
- 中国镜像的地址为 https://www.gstaticcnapps.cn/tfjs-models/savedmodel/posenet/mobilenet/float/050/model-stride16.json
他们的 URL Path 都是 /tfjs-models/savedmodel/posenet/mobilenet/float/050/model-stride16.json
- 官方文档 TensorFlow.js
- 模型
- API