Code to use a set of Adafruit NeoTrellis boards as a monome grid clone using an off-the-shelf microcontroller.
Tested mostly using a Teensy 3.2 microcontroller. Teensy 4 should work the same, but it does not have USB pads broken out to use a USB breakout board.
There is code for using an Adafruit SAMD21/51 M0/M4 boards like the Feather and ItsyBitsy, but this will probably require compiling the firmware for your specific board. Compiled firmwares for Feather M4 are in the repo.
Code for RP2040 is also available, but this will probably require compiling the firmware for your specific board.
At the time of writing, this code works as expected with the neotrellis-grid connected to a computer with Max running monome patches.
Some people have reported issues with the neotrellis-grid getting recognized by Windows 10. Windows users are advised to install serialosc 1.4.3 and bonjour print services (v2.0.2?).
2021 updates to ansible / teletype / trilogy modules now support the neotrellis-grid. It should work without modifications.
As of update version 210607 (June 2021) it should be plug and play. Previous versions are unsupported.
For Fates devices this should be functional by default on the most recent firmwares.
8 Adafruit NeoTrellis driver boards [alt Mouser | Digikey ]
8 Button keypads [alt Mouser | Digikey ]
1 Adafruit micro B USB Breakout [alt Mouser | Digikey ]
1 Teensy 3.2 [alt Adafruit ]
1 Adafruit STEMMA/JST-PH 4-pin cable - for testing inndividual neotrellis boards before assembly. Cut the cable in half and wire to the appropriate pins on a Teensy or other microcontroller (VIN, GND, SCL, SDA). See the neotrellis boards themselves for the pin-out.
Standard pin headers - 10 1x5 pin headers can be used for joining the neotrellis boards together. See video
Flexible PCB Carrier (Flexi PCB) for mounting the teensy to the neotrellis boards. For sale here
- Test each neotrellis board individually using the Adafruit examples in the
File>Examples>Adafruit seesaw Library>Neotrellismenu. The Basic sketch is good for testing individual boards. Themultitrellis>basicsketch is good once you have all the boards connected and addresses assigned.
-
Review the Adafruit tutorial on the neotrellis boards.
-
see this video for an example of how to join the boards together
-
see this graphic for a default layout of addresses and jumper positions for 8 neotrellis boards.
-
new default address order in the code for 16x8 layout (NOTE the address are in reverse order in the code - as compared to the graphic above):
  { Adafruit_NeoTrellis(0x32), Adafruit_NeoTrellis(0x30), Adafruit_NeoTrellis(0x2F), Adafruit_NeoTrellis(0x2E)}, // top row
  { Adafruit_NeoTrellis(0x33), Adafruit_NeoTrellis(0x31), Adafruit_NeoTrellis(0x3E), Adafruit_NeoTrellis(0x36) } // bottom row
-
see this neotrellis i2c address chart if you want to define your own addresses
-
Don't worry about the INT pin - it's not used in the grid software.
Get the firmware "hex" file from directory in this repo (download the entire repo ZIP file - not just individual files).
Get TyTools from GitHub here. More info here (https://koromix.dev/tytools).
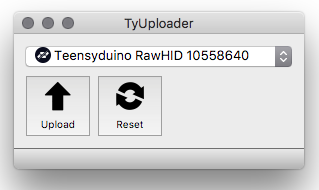
Install TyUploader and open it. Be sure your neotrellis-grid is plugged in. The grid/Teensy should show up in the TyUploader application... or select Teensy or Teensyduino from the pull down menu if needed.
Click the Upload button and select the firmware hex file you want to upload. This should upload the firmware and the neotrellis-grid should reboot. That's it.
In Arduino/Teensyduino - be sure you have the settings in Tools -> USB Type set to Serial
Not critical, but set Tools -> CPU Speed to 120 MHz (overclock)
For reference: here's a forum post on how to flash Teensy firmware
See the repo directories for using the Adafruit Neotrellis M4 device (8x4 grid) or SAMD M0/M4 devices (like Adafruit's Feather/ItsyBitsy/QtPy/etc). Precompiled UF2 firmwares are available in those directories for some configurations.
-
Triple check your address jumpers - see this graphic for a default layout of addresses and jumper positions for 8 neotrellis boards.
-
Be sure you have the Adafruit Seesaw libraries installed and are up to date (via the Arduino/Teensyduino Library Manager)
-
Use the multitrellis_test sketch to test fully assembled grid before flashing neotrellis_monome_teensy.
-
Be aware - the multitrellis array will fail to initialize if the addresses are wrong, or the wrong number of boards are attached. If you get no LEDs are just some LEDs - then your addresses are likely the problem.
-
There are Teensy specific
i2c_t3example sketches which can be used to double check your i2c addresses. SeeFile>Examples>i2c_t3>basic_scannerin Arduino/Teensyduino for more.
see this thread on the lines forum for assistance.
https://github.com/oldmanfury/neotrellis-grid-paletted
If you already have serialosc installed/running, you may need to unload serialosc to get arduino to properly flash the teensy, then load serialosc to get Max to recognize the grid.
launchctl unload /Library/LaunchAgents/org.monome.serialosc.plist
launchctl load /Library/LaunchAgents/org.monome.serialosc.plist
Max apps for testing:
Monome Home
test-grid
The mext protocol is used for serial communication - same as what is used in most recent monome devices.
serialosc is required for serial communication with MacOS/Windows computers and OSC devices. Linux may use serialosc or libmonome depending on the application. libmonome is basically driver code which also facillitates monome serial communication.
You can get both serialosc and libmonome code from monome github page, and building them is well documented on official linux docs (they work for macOS as well), read part 2 Preparing your system: serialosc (ignoring the sudo apt-get - I was missing liblo, but it's available on homebrew): monome.org/docs/linux/.
